Tuesday, September 22, 2009


Finger knitting can be usefull!

These are just three of the pouches I've woven and added a finger knit cord to. The top one nicely holds my cell phone when my pockets are full of keys and a wallet. You know, for those days when you just want to march around with your arms swinging. The magnetic clasp hold the flap in place but it's very easy to get open when it needs to be.

The green and blue one is tablet woven. The two glass rods beside it are the colors of glass I'll use to make beads for the ends of the cord. This little bag holds a comb for untangling threads when I weave and a homemade pin for securing the cards while that gets done. The cord is short because it just hangs on the loom.

The little brown bag with the terrible picture is a rather interesting type of weaving that is done on a piece of cardboard and 'in the round'. There are no seams in it. Hmmm, that might be another blog!

Anyway, that's enough about finger knitting for a while!


Friday, September 18, 2009

joining the modern age

I love card weaving but I can only use so many belts. Now I'm stitching them into little pouches! Finger knitting is a great way to make matching cords for the pouches. Check out my first ever 'how-to' video if you'd like to make cords for your hand woven works too.

Sunday, September 13, 2009

card weaving 101

Oh where. oh where have my pictures all gone? lol. I had them nicely arranged from one to five but when I was trying to put the appropriate explanation beside each one photo numbers 1 through 4 dissappeared into the abyss that is the world of we-are-smarter-than-up-so why-don't-you-give-up computers. The pictures are in the previous post but they are in the wrong order. I'd straighten this all out but the originals are in another computer. I'll change it all tonight but for now this will have to do.


So these two posts should be a visual reference for how the cards need to be in worked in double faced card weaving. Double faced card weaving is where the pattern you work shows up in reverse on the other side of the weaving. It usually involves two different colors of thread. In this case the two colors are green and white.

The blue line you see is drawn on both sides of the cards as a reference to make it easier to create the pattern. It's much easier to see a line than it is to look for the A and B holes that decorate most cards.

Photo number 1 shows the 'home position', at least for this project. It can be on the bottom of the pack, the top of the pack or closest to you. The key is to keep it consistent. It's the fact that the lines are all together in the same position at the same time that is important. The home position you decide on will be and indicator as to when a row of the pattern has been completed . For this choice of home position, when the cards are directly opposite it's time to move to the next line of the pattern just like it is when they are in the home positon. If the card line is horizontal then a row has only been half worked. But that is getting slightly ahead of things.


Photo 2 shows the pack divided into two groups; the cards that were turned towards the fell (the weaving) to create the background and which cards were turned the other way to create the pattern. By create I mean that the cards were turned to bring the appropriate color of thread to the top where it would be locked in place by the weft thread of the shuttle.

If you get into the habit of sliding the cards that make up the background pack of cards close to you and sliding the pattern cards away from you the work will move along faster.

If you have marked your pattern before hand it will indicate which way to turn the background pack (green threads), which for this row was 'backwards' or towards the weaving. (Linda Hendrickson advices this and she does beautiful work.) The blue line is now on top.

The shuttle moved through from right to left. In double faced card weaving the cards move twice, or one quarter of a complete rotation for every one row of the pattern. With the shuttle on the left of my weaving I know that I am only half way through the two step row of the pattern. The more ways I give myself to know where I am in the pattern the less ripping out I have to do. That's all good!


Photo 3 shows the second part of this row of the pattern. The blue line is closest to the fell now, because the background cards were turned backwards again (towards the weaving). The pattern cards turned forward. The white threads showed up against the green background, just what was supposed to happen!

The pack cards were then slid into one group with the blue lines all in the same place. If they aren't all in the same positon a card was missed or not turned correctly.

The shuttle moved through the warp from left to right. When it's on the right hand side of the warp it's an indication that the pattern row is completed.


Photo 4 shows the start of the next row of the pattern. The row indicator got moved (see earlier post). It showed that for this pattern row the background (green threads) had to turn forward. The blue line shows that those cards were, indeed, turned forward, away from the fell. My pattern cards will be turned backwards, towards the fell. With that line marked on the cards it is easy to see if I've turned them the right way.

Photo 5 shows the cards all turned the last time for this row of the pattern and resting again in the home position. I slid the cards all into one pack to tell myself that the pattern row was finished.

Hope this photo lesson helps other card weaving newbies!

one, two, three, weave!


Wednesday, September 9, 2009

keeping track of rows in the pattern

The detail of the details......


Years ago I owned a sheet of metal with a couple of magnets on it for keeping track of where I was in needlework and knitting patterns. I have no idea where it is now, but for weaving something similar seems to be essential.

I couldn't find a replacement in any of the nearby stores, so I took a piece of metal to the local metalworking shop and had them cut it into 8.5 x 11 sheets. Some of the extra magnets on the fridge got a coat of spray paint and viola! My row marking system was complete. If I want more I'll have a cookie sheet cut up. (As long as it holds magnets!)

However, it took a while to get the cutting done. In the meantime I punched holes in a plain index card and used it. I taped the pattern down and used more tape to hold the index card in place as I moved it from row to row.

It worked just fine!

The devil is in the details


Well it took a lot longer than I expected (doesn't it always) but I think I have the basics of card weaving figured out. I got lots of help from fellow weavers on Ravelry. That was great!


What it took to get me going was finding a method of working that allowed me to know where I was in the pattern at all times and what I had to do next. That meant amalgamating all the methods I had read about into one that worked for me. Since I had found lots videos that showed looms, or people making cards and actually weaving I just needed to know how to move the cards. Did I say 'just'? Those are the details that make all the difference, aren't they?

Knowing what card to turn when and what direction to turn it was the missing detail. Here are a few things I that helped me conquer the details.


The first thing I did was dispense with the traditional 'A' and 'B' method of describing the position of threads on each card. I made my own cards from an old poker deck and simply drew a line on both sides of the cards between two of the holes. That would indicate where similar color threads were and, more importantly, my starting and ending position for weaving. (Linda Hendrickson advises this. Watch her video on continuous warp. She does amazing weaving!)

I also made a handy 'pin' to lock the cards in position when I was away from the loom or needed to move the warp. It's part of a coat hanger. All it took was a pair of needle nose pliers and the overwhelming desire to keep the cards in place when I was frustrated and needed to take a break.

Here are a few things I found while the weaving is underway that made it easier for me to get good results:

1. Always know where the shuttle is supposed to be when a row of the pattern is completed. Is it on the left or the right of the warp? That way, if you now if you're just starting a row, in the middle of one, or just finished. (Call the finished position the 'resting' position.)

2. Before you start weaving mark your pattern as to what direction the background pack of the row is to turn. Isolate each row in your view while you work it so you don't get confused as to where you are in the pattern. (More on that later)

3. Be consistent as to where you slide the cards when you separate them for turning in your design. For instance, always put the cards for the background nearest you on the warp and those the make up the pattern further way from you. I chose not to work separate selvages just yet.

4. Once the cards are separated into background and pattern packs consult the row isolated on the pattern and turn each pack the right way. Put the shuttle through, then turn the cards again in the same direction to complete the row. Put the shuttle through the final time to it's resting position. Then move the row indicator on your pattern.

5. Reassemble the cards into one group and check to see that the lines are all the the same place. By having a line on the cards I could quickly shuffle through to see if I've left a card behind when I was turning or if I turned any the wrong way.


Monday, August 24, 2009

this is frustrating as all getup!

I've decided that card weaving is compatible with bead making. Okay, that is a stretch but there is logic there. Let me explain.


I know how to make beads. I may not be the best at it but, but it's become play rather an learning. And I like learning just as much as I like playing. And besides, learning is supposed to keep you young. Why would anyone bet against that theory being wrong? Besides, I can put beads on the woven bands; I just have to learn to do it.

I've adopted Linda Hendrickson as my guru and absolutely love Candice Crocketts' book 'Card Weaving" (Isbn 0-934926-61-0 and it's not difficult to find) but I'm missing something. I keep getting the dreaded 'floating warp'.

I'm posting this to see if anyone can help me figure it out. Yay Ravelry!

Saturday, June 28, 2008

slight change of focus


I might not be able to make beads thanks to the limited vision in my left eye but I can still sew!
I used a few beads that were a set, added a focal and raided my stash! It was alot slower going than I had hoped but if my vision problem is caused by MS I might as well get used to it. I have no intention of letting it stop me but I will work with it if I have to!
You can see the back of the bracelet on the left. The beads are simply sewn onto that support -in no particular order I might add! The square shinney ones are some I picked up last year at a bead show but all the other larger ones are mine. The heart is a hollow bead from that cosmic storm color I was talking about before.
Check out out at my Etsy site!
Anyway, I'm counting down the sleeps until I head to England with my twin sister and her daughter. Our youngest sister is there ready to show us all the sites. I hope to take a few minutes out from visiting castles to find a bead store or two!
TTFN,
Marni

Wednesday, June 25, 2008

Pink Peonie


We are lucky to have a full garden bed of heritage Peonies and right now the pink ones are in bloom. The white ones are just about finished. The dark maroon ones are the first to bloom- they're my favorite but I was so busy making beads this year that I neglected to take a picture of them. Sorry!

I've decided to try and spend a more time outside for the next little while so I won't worry so much about why I can't see out of my left eye. The Ophthalmologist I saw said it is most likely MS. I'll be seeing a neurologist soon to find out for sure.

In the meantime I can't make beads. I can't get the toothpaste down the center of my toothbrush either! I have to say, not making beads is worse than a messy sink. But I can take pictures and plan to spend more time working with beads I've already made. Keep checking out my etsy site!

TTFN,
Nella

Tuesday, June 17, 2008

One more shot from the weekend....

This is the Saturday Morning group and yes, it was as quiet in there as it looks! No one was talking; everyone was working. Just about all of us came out of it with a bead or two to show for our efforts.

We were working in a single car garage that was open to the wind unless we kept the door shut. But if we kept the door shut, no one could get in and out. Ventilation was pretty bad without the door open, too. We compromised by bracing the door on a chair. When we needed thechair we swapped it out for an plastic bucket, which we smashed to smithereens by dropping the door on it. OOooops.

But maybe I should explain what Iron and Ink was and why the people in the photographs may not be dressed quite, well, normal.

This was an SCA event --the Society for Creative Anachronism. We're a bunch of Medieval history buffs. For fun, we dress up in medieval 'garb' and play at reliving various aspects of European history between 650 and 1650 C.E. It's great fun. I'll throw in more pictures as I find them.

TTFN!

Monday, June 16, 2008

Iron and Ink


It was a great weekend across the line! We made beads, beads and more beads!

Tuesday, June 10, 2008

Sour Apple Green


Early transparnet apples have always been a favorite of mine. They're sharp and tangy and full of flavor. It could also be that in a family of five kids, it was good to like something the rest of the kids didn't.
Anyway, I caught the flavor of the Okanagan Summer in this bead, or at least I think I did. It's been made into a necklace with accent beads that got in Ottawa. They're Czech, or maybe Chinese but they're certainly mass produced. You can see the mold lines clearly in the picture. The video I have on the process seems to be missing (Duh-oh) but this one at least shows the press process.
If I find the other video I'll post it. It really is quite interesting and it shows why mass produced beads are so cheap. People wonder why handmade lampwork beads are so much more expensive. Well, they're made one at a time and can take up to an hour to make!
This bead didn't take quite that long, but it was likely close to it. The light green and white had to be twisted together when they were molten and allowed to cool before they could be remelted onto the bead. Time flies by when I'm at the torch so I don't always know how long each bead takes. I've bought a small clock to set beside the torch to see if I can't solve that. Might be a good way to stop being surprised when Russ appears at the shop door and suggests it might be time to quit. He rarely goes to bed before 11!
Be well all,
Marni

Friday, June 6, 2008

The newest creations.....


Made these last week while I was impatiently using all the oxygen in the tank so I could switch to the concentrator! Before when the tank was getting low the feeling was of panic, not joy. With the new concentrator sitting at my side the feeling was all different this time.

I used handpulled stringer of Cosmic Storm, the new glass I told you about last time. The base is dark amber (like the heart). The biggest beads are hollow, so they are lighter in weight than they look.

The little beads are solid inside. They're an example of constraint. I'm trying to force myself to make complete sets of beads --including earring beads--instead of just making focals. The focals are the most fun but earrings sell! Guess there really are women out there who change their earrings more than once every few months. If I do that I end up wearing ones that don't match my outfit or not wearing any at all. Mornings are not me. The easier I can make it the better it is for all concerned!

Take care all!

Marni

Tuesday, June 3, 2008

hot times in the ol' town last night!


Life has changed dramatically in the bead department with the addition of an oxygen concentrator to the list of equipment in my shop. No more worrying about how much oxygen is left in the tank. It was difficult to concentrate on developing my own style when I was always worried about how much more time I had at the flame before I couldn't play any more.

I dealt with this fellow http://www.brentgraber.com/catalog.php?category=10 . It was a much easier process than I had imagined. Trusting someone on the internet is fraught with danger, isn't it? But here I was trusting someone a content away with not only my hard earned money but my hopes and dreams as well! He came through though, and for that I am gratefull.

So, onward! It's time to tidy up the house a bit --okay, a lot--and get some beads strung for sale. My Etsy site is a little bare of ready to wear jewelry. Take a look for yourself: Nellabellabeads.etsy.com


The heart bead is one I just made. It's a hollow dark amber with swoops and swirls of 'Cosmic Storm'. It's a new glass that was made in a limited quantity. It was a gift from some fellow glassmakers and I love it!
Off to clean!
Marni


Sunday, June 1, 2008

long time --no see!


What can I say? It's been busy. The whole family was in Ottawa for a week watching the graduation ceremonies of our youngest, Mark. He graduated from the Royal Military College in Kingston and is now a second lieutenant. Pretty cool to watch people salute him! Looks pretty darned good in a uniform, eh? That's him carrying the RMC flag at a ceremony in which the 4th year students hand over the colors to the third year students.
Have been busy with spring and all that it brings since we got back. Made some wonderfull beads --check 'em out at Nellabellabeads.etsy.com . I'll try and get some pictures on line soon but if I want to be able to spend all my time on art it's important that we sell one of our businesses so ---I'm off to start a new blog on what Hunting Hawk Vineyards offers potential buyers!
TTFN!

Friday, March 14, 2008


Wow. That's a bad picture. It was night time and there wasn't quite enough light. Oh well, you get the idea. I'd do it again but I want to to make more beads.
later,
Marni

Thursday, March 13, 2008

Good day!

Gave myself a full day at the torch today to make up for the busy next few days. Not that it evens out, mind you.

I still get crabby if I don't get to play with fire. It's not quite spring in the Gulch but it's sooooooo close! Our little valley keeps the snow much longer than everywhere else. We also stay cooler in the summer so it's not so bad. It makes it a lot easier for me to be in the same room as the kiln and a blazing hot torch in July.


This year I can't wait to get outside and dig in the gardens. I'll post pictures as soon as I can. No point doing taking garden pictures until the snow leaves. In the rest of Canada they still know what it looks like. Here in the Okanagan there isn't much left except for at our house!


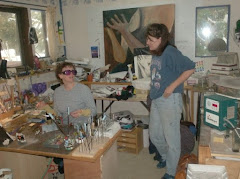
Anyway, I'm working on getting more pictures posted. I'm just being way to picky. The one of Nicole and I in the shop is bad enough. Those are my favorite jeans to work in and it shows! Consider the tear in the knee ventilation.


Cheers.

Marni

Midnight at the Gulch

I should have been asleep hours ago but I told myself I wouldn't quit for the day until I had a blog. It's taken longer than I thought. That likely has a lot to do with being more of an artist than a computer geek. Though I have to say, I've really enjoyed learning more about computers and what they can do. It's a means to an end for me. I want to share my work with others in the art community and to do that I have to use a computer.

More about all of that tomorrow. I just took a quick dip in the hot tub to see if I could point my thoughts towards sleep. I could keep writing or I could snuggle in beside hubby all nice and warm and think of how pretty the stars looked.

Night.