Wednesday, September 9, 2009

The devil is in the details


Well it took a lot longer than I expected (doesn't it always) but I think I have the basics of card weaving figured out. I got lots of help from fellow weavers on Ravelry. That was great!


What it took to get me going was finding a method of working that allowed me to know where I was in the pattern at all times and what I had to do next. That meant amalgamating all the methods I had read about into one that worked for me. Since I had found lots videos that showed looms, or people making cards and actually weaving I just needed to know how to move the cards. Did I say 'just'? Those are the details that make all the difference, aren't they?

Knowing what card to turn when and what direction to turn it was the missing detail. Here are a few things I that helped me conquer the details.


The first thing I did was dispense with the traditional 'A' and 'B' method of describing the position of threads on each card. I made my own cards from an old poker deck and simply drew a line on both sides of the cards between two of the holes. That would indicate where similar color threads were and, more importantly, my starting and ending position for weaving. (Linda Hendrickson advises this. Watch her video on continuous warp. She does amazing weaving!)

I also made a handy 'pin' to lock the cards in position when I was away from the loom or needed to move the warp. It's part of a coat hanger. All it took was a pair of needle nose pliers and the overwhelming desire to keep the cards in place when I was frustrated and needed to take a break.

Here are a few things I found while the weaving is underway that made it easier for me to get good results:

1. Always know where the shuttle is supposed to be when a row of the pattern is completed. Is it on the left or the right of the warp? That way, if you now if you're just starting a row, in the middle of one, or just finished. (Call the finished position the 'resting' position.)

2. Before you start weaving mark your pattern as to what direction the background pack of the row is to turn. Isolate each row in your view while you work it so you don't get confused as to where you are in the pattern. (More on that later)

3. Be consistent as to where you slide the cards when you separate them for turning in your design. For instance, always put the cards for the background nearest you on the warp and those the make up the pattern further way from you. I chose not to work separate selvages just yet.

4. Once the cards are separated into background and pattern packs consult the row isolated on the pattern and turn each pack the right way. Put the shuttle through, then turn the cards again in the same direction to complete the row. Put the shuttle through the final time to it's resting position. Then move the row indicator on your pattern.

5. Reassemble the cards into one group and check to see that the lines are all the the same place. By having a line on the cards I could quickly shuffle through to see if I've left a card behind when I was turning or if I turned any the wrong way.


Monday, August 24, 2009

this is frustrating as all getup!

I've decided that card weaving is compatible with bead making. Okay, that is a stretch but there is logic there. Let me explain.


I know how to make beads. I may not be the best at it but, but it's become play rather an learning. And I like learning just as much as I like playing. And besides, learning is supposed to keep you young. Why would anyone bet against that theory being wrong? Besides, I can put beads on the woven bands; I just have to learn to do it.

I've adopted Linda Hendrickson as my guru and absolutely love Candice Crocketts' book 'Card Weaving" (Isbn 0-934926-61-0 and it's not difficult to find) but I'm missing something. I keep getting the dreaded 'floating warp'.

I'm posting this to see if anyone can help me figure it out. Yay Ravelry!

Saturday, June 28, 2008

slight change of focus


I might not be able to make beads thanks to the limited vision in my left eye but I can still sew!
I used a few beads that were a set, added a focal and raided my stash! It was alot slower going than I had hoped but if my vision problem is caused by MS I might as well get used to it. I have no intention of letting it stop me but I will work with it if I have to!
You can see the back of the bracelet on the left. The beads are simply sewn onto that support -in no particular order I might add! The square shinney ones are some I picked up last year at a bead show but all the other larger ones are mine. The heart is a hollow bead from that cosmic storm color I was talking about before.
Check out out at my Etsy site!
Anyway, I'm counting down the sleeps until I head to England with my twin sister and her daughter. Our youngest sister is there ready to show us all the sites. I hope to take a few minutes out from visiting castles to find a bead store or two!
TTFN,
Marni

Wednesday, June 25, 2008

Pink Peonie


We are lucky to have a full garden bed of heritage Peonies and right now the pink ones are in bloom. The white ones are just about finished. The dark maroon ones are the first to bloom- they're my favorite but I was so busy making beads this year that I neglected to take a picture of them. Sorry!

I've decided to try and spend a more time outside for the next little while so I won't worry so much about why I can't see out of my left eye. The Ophthalmologist I saw said it is most likely MS. I'll be seeing a neurologist soon to find out for sure.

In the meantime I can't make beads. I can't get the toothpaste down the center of my toothbrush either! I have to say, not making beads is worse than a messy sink. But I can take pictures and plan to spend more time working with beads I've already made. Keep checking out my etsy site!

TTFN,
Nella

Tuesday, June 17, 2008

One more shot from the weekend....

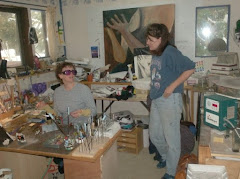
This is the Saturday Morning group and yes, it was as quiet in there as it looks! No one was talking; everyone was working. Just about all of us came out of it with a bead or two to show for our efforts.

We were working in a single car garage that was open to the wind unless we kept the door shut. But if we kept the door shut, no one could get in and out. Ventilation was pretty bad without the door open, too. We compromised by bracing the door on a chair. When we needed thechair we swapped it out for an plastic bucket, which we smashed to smithereens by dropping the door on it. OOooops.

But maybe I should explain what Iron and Ink was and why the people in the photographs may not be dressed quite, well, normal.

This was an SCA event --the Society for Creative Anachronism. We're a bunch of Medieval history buffs. For fun, we dress up in medieval 'garb' and play at reliving various aspects of European history between 650 and 1650 C.E. It's great fun. I'll throw in more pictures as I find them.

TTFN!